 |
| Photo courtesy of What's That Bug?
That is one heck of a morsel for our fishy friends. TROUT AND SMALLMOUTH LOVE THEM. Sure we can use a woolly bugger to represent the larva but why not use a better representation. Super tyer, Pat Cohen, has given us a medium to create such a pattern. Cohen's Creatures is a collection of synthetic chamois cut-outs that represent a multitude of body parts from various critters like crawfish and frogs. Enough BS'ing. Here you go.
 
Cut the Cohen's Creature- Hellgrammite where the thorax and abdomen meet.

Thread the abdominal portion of the Creature onto the hook.

Apply a thread base from the eye to the bend of the hook.

The colors vary dramatically but the brown olive L4FF Hare Blend is a good place to start.

Create a dubbing ball.

Apply several wraps of thread to secure the rear segment in place.

Create another dubbing ball.

Secure the next segment in place with several more thread wraps.

Create another dubbing ball to create the next segment.

Secure the next segment in place with a few wraps of thread.

Create the last dubbing ball for the abdominal section.

Secure the last segment in place with a few more wraps of thread.
   
Mark the abdominal section to your liking.

No need to explain.

Apply one coat of the UV Resin on top of each segment.
 
Add another coat of UV Resin to accentuate the segmentation.
 
Wire for the junction between the back and front hook.
 
Place the Evolution Bead and apply a thread base (never knew I was a rapper did you).

Pass the wire through the eye of the rear hook and secure in place on the front hook.

Secure a bit of lead wire on the bottom of the hook shank to ensure that the fly rides properly.

More of the same L4FF Hare Blend to help create the thorax.

Start with another dubbing ball just in front of the bend of the hook.

Secure the front section of the Helgi Creature with several wraps of thread.

Im missing a photo but create another dubbing ball and secure the next segment in place.

And again. Thank you sir may I have another.

Lets get ready to mark.
   
Superglue to the head to the bead.
  
Repeat with the UV Resin and create the front 4 segments. VIOLA!
 |

Thursday, August 25, 2016
Articulated Helgi- Hellgrammite Larva Using Cohen's Creatures, Live 4 Fly Fishing Hare Blend, Flymen Evolution Beadhead and Deer Creek UV Flex Resin
Of all the fly patterns bouncing around the interwebs, we rarely see any aimed specifically at representing an important food source to various freshwater species found throughout the Americas, Asia and Africa, the hellgrammite or dobsonfly. These giant Megalopterans are from the Corydalidae family and are voracious, aquatic insectivores. That's correct! They are generalist predators that prey on many of the mayflies, stoneflies, caddisflies and midges that fly tyers aim to represent at their vises. You know, those little bugs that can often be difficult to see.


Saturday, October 31, 2015
Burrowing Mayfly Nymph Pattern- Daiichi 1870, Flymen Evolution Tungsten Beads, Virtual Nymph Skin, Deer Creek UV Flex Resin
 |
| Natural Burrowing Mayfly Nymph |
 |
| Daiichi 1870 Larva Hook |
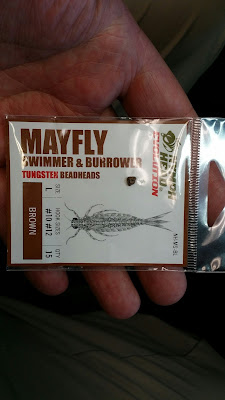 |
| Flymen Nymph Head Evolution Beads (Swimmer/Burrower) Size Large |
 |
| Thread the Evolution Bead onto the hook |
 |
| Apply a thread base behind the hook eye |
 |
| Select 2 Goose Biots for the antennae |
 |
| Secure a biot on the top and bottom of the hook eye |
 |
| Select some Rubber Legs which will create the tusks |
 |
| Secure 2 tusks in place in between the antennae |
 |
| Slide the Evolution Bead to the hook eye and hold in place with a tapered thread ball |
 |
| Select 3 Ostrich Plumes which will be used for the tails |
 |
| Secure the Ostrich Plumes in place on your side of the hook |
 |
| Add a section of mono (.010) on the top and bottom of the shank |
 |
| This step creates a flatter profile to the abdomen |
 |
| Grab a pack of translucent cream Virtual Nymph Nymph Skin |
 |
| Cut one end at an angle for easier tie in |
 |
| Secure the Nymph Skin in place at the rear of the hook (angled side facing up) |
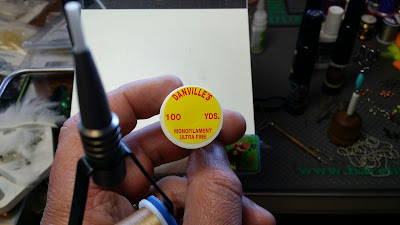 |
| Grab the Mono Thread and secure a 10" strand at the rear of the hook |
 |
| Advance the first bobbin forward and add another bobbin loaded with Mono Thread at the 1/3 point |
 |
| Wind the Nymph Skin forward and secure in place behind the bead |
 |
| Select 2 Pheasant Aftershaft (secondary) Feathers for the gills |
 |
| Strip the barbs from one side of the feather (this is the top gill section) |
 |
| Strip the other feather in the same way (this is the bottom gill section) |
 |
| Secure each gill section in place at the 1/3rd point using the Mono Thread |
 |
| Wind the 10" section of mono from the rear through the gills and all the way to the eye (use the segmentation the Nymph Skin created for the spacing). Tie off with the forward bobbin and whip finish. Remove it. |
 |
| Cut a strip (thinner than 1/8") of Spirit River Mottled Nymph Skin for the wing cases |
 |
| Cut one end to a point for easy tie in |
 |
| Secure the Mottled Nymph Skin in place at the 1/3rd point with the Mono Thread |
 |
| Select dark brown, light brown and yellowish waterproof markers |
 |
| Mark the abdomen to your liking |
 |
| Use Deer Creek UV Flex Resin to help seal the markings on the abdomen |
 |
| Cure the UV resin with the Deer Creek Torch |
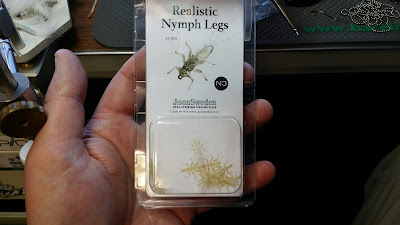 |
| Size medium J:son Realistic Nymph Legs |
 |
| Secure the 6 leg set in place (on your side of the hook) |
 |
| Lay the wing case forward and secure in place between the mid and forelegs. Mark the joint areas of all the legs with a dark brown waterproof marker |
 |
| Lay the wing case forward to behind the Evolution Bead to create the forward case. Whip finish |
 |
| Coat the wing cases and joint areas of all 6 legs with Deer Creek UV Flex Resin |
 |
| Cure the resin |
 |
| Also coat the joint areas on the underside of the legs and abdomen with the UV resin |
 |
| Cure the UV resin on the underside with the UV light |
 |
| VIOLA! |
Subscribe to:
Posts (Atom)