Sunday, August 30, 2015

Abel Zinger and Abel Nipper- The Best of the Best in Streamside Fly Fishing Tools


Have you grown tired of having to purchase a new zinger and/or nipper once, twice or even three times a year? How many of you have lost your zinger and nipper combo due to a faulty clip or pin? Or, better yet, who of you have had to purchase a new nipper after half a season because the cutters are junk and wont cut 7X anymore? Have no fear, the answer is here.

The Abel Zinger and Nipper are the closest thing to a "lifetime", streamside tools that you'll find. Sure they're cool. Sure, they're not cheap. Secure them and you're set. Loose them and you'll be purchasing new ones because you'll instantly be attached to both tools.  I had my Abel Nippers attached to my lanyard for the last 4 full seasons and still havent had to replace the jaws. Yeah, that's right. They have replaceable cutters too. Send them into Abel and they'll precision fit a new set of jaws to the body.

Below is a breakdown on the Abel Nippers.


Features:
  • Designed, Manufactured and Assembled in the USA
  • Anodized aluminum body construction
  • Replaceable jaws - machined out of premium grade stainless steel, then heat treated to 58-60rc
  • Saltwater resistant
  • Engineered to Cut 7x - 100 lb mono and braid line.
  • 2 Year limited warranty on the jaws after initial purchase
  • Standard Black - $ 60.00, Solid Finishes - $70.00, Fish Graphic - $ 110.00
  • Fish Graphic options may take up to 4-6 weeks to ship
Materials:
  • Screws - 303 Stainless Steel
  • Body - T-6061 T6 Aluminum
  • Jaws - Crucible CPM S35VN
  • Pin - 316 Stainless Steel
Specifications:
  • Weight: .7 ounces
  • Height: .420"
  • Length: 1.800"
  • Top Width: .710"
  • Bottom Width: .560"

Abel has streamlined, modernized and perfected the ubiquitous zinger tool found on virtually every fly fisher’s vest. Zingers are used to hold nippers, clippers, de-barbing pliers, fly floatant, scissors, magnifying glasses, you name it. These necessities are within easy reach on a retractable spool at all times. As mentioned previously, up to this point the aforementioned retractable tools always end up breaking or falling apart and we lose our prized and important necessities. Dont fret.
Abel’s made-in-the-USA Zinger boasts stainless steel and 6061-T651 cold finished aerospace grade aluminum and is designed with the option to either attach to a vest using a screw mechanism or utilize the included “S” carabiner to clip it to a D-ring on a vest or sling pack. The 36-inch retracting cord is manufactured from a spectra-nylon blend with 40-pound test strength, ensuring an angler’s ability to reach wherever is needed without breakage – the number one complaint with plastic “bargain” retractable spools.


Trust me on this one.

Wednesday, August 12, 2015

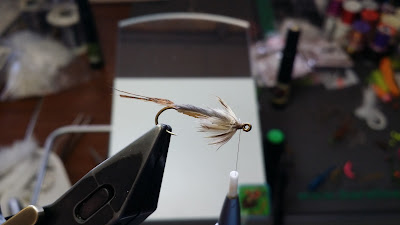
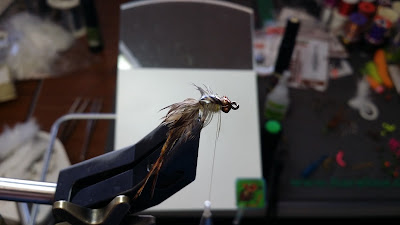
SBS Hise's Nympho-minnow-ac Variation- Virtual Nymph Nymph Skin, Daiichi Hooks, Hareline Barred Ostrich Plumes and various SotherFeathers and Flymen Nymph Head Evolution Beadheads

Daiichi 1850 Flat Eye Streamer Hook (or similar)
http://www.castersonlineflyshop.com/hareline-barred-ostrich-plume-piece/
Hareline Barred Ostrich Plume (mark it to your liking or not)
Pick and secure 2-3 plumes in place at the rear of the hook
http://www.castersonlineflyshop.com/virtual-nymph-vn-nymph-skin/
Virtual Nymph Nymph Skin
Cut one end at an angle and secure in place at the rear of the hook
Wind Nymph Skin forward to behind the hook eye and secure in place
http://www.castersonlineflyshop.com/chartpak-ad-fly-tying-markers/
Mark to your liking with waterproof markers

http://www.castersonlineflyshop.com/deer-creek-diamond-flex-uv-resin-flexible/
Apply Deer Creek UV Flex Resin for the only tack free finish
http://www.castersonlineflyshop.com/deer-creek-pro-torch/
Cure the UV resin with the Deer Creek Pro Torch
http://www.castersonlineflyshop.com/ringneck-pheasant-skin/
Select 2 aftershaft feathers from a Ringneck Pheasant (or similar)
Strip one side of the aftershaft (this one is ready to be tied into place on the side closest to the right handed tyer)
Tied into place behind the hook eye
Repeat steps for the opposite side of the abdomen
http://www.castersonlineflyshop.com/grizzly-mini-marabou-feathers/
Select an appropriate sized Grizzly Marabou aftershaft feather for the collar
Secure into place behind the hook eye
Wind the aftershaft feather several times to create a collar on the rear shank
Whip finish and the rear section is complete
http://www.castersonlineflyshop.com/daiichi-x510-x-point-hook/
Grab a bag of Daiichi X510 for the forward section
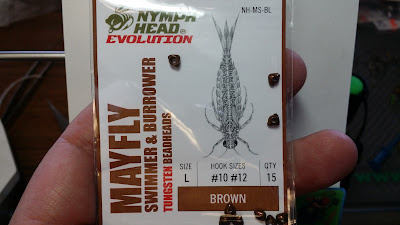
http://www.castersonlineflyshop.com/nymph-head-evolution-beadheads-mayfly-swimmer-burrower/
Select a Nymph Head Evolution Mayfly Burrower Beadhead
Thread it onto the X510 hook
Create a thread base and end up with your thread to the rear of the hook
Select a piece of junction material
Thread it through the previously tied rear section and double it over
Secure it in place to the front section
Utilize a pair of wire cutters to cut the rear hook
Select another aftershaft feather from a Grizzly Marabou feather. Secure it in place at the rear of the forward hook and wind 3 or 4 turns to create a collar. The photo is missing because I cant figure out how to put it in place :-) Something went haywire.


Spirit River Mottled Nymph Skin
http://www.castersonlineflyshop.com/spirit-river-mottled-nymph-skin/
Cut a strip smaller than 1/8" and cut one end to a point
Secure it in place ahead of the aftershaft collar
Select the appropriate sized rump or wing feather from a Ruffed Grouse (or similar)
Create a tie in point at the tip of the feather
Secure into place ahead of the Mottled Nymph Skin
Choose your favorite dubbing
Dub to just behind the Evolution Bead
Lay the rump feather forward and secure in place behind the Evolution Bead
Lay the Spirit River Mottled Nymph Skin forward and secure in place behind the Evolution Bead

Whip finish
Apply Deer Creek UV Flex Resin to the head and wingcase